
Nostrum Damus SASS #110702
-
Posts
786 -
Joined
-
Last visited
Content Type
Profiles
Forums
Events
Everything posted by Nostrum Damus SASS #110702
-
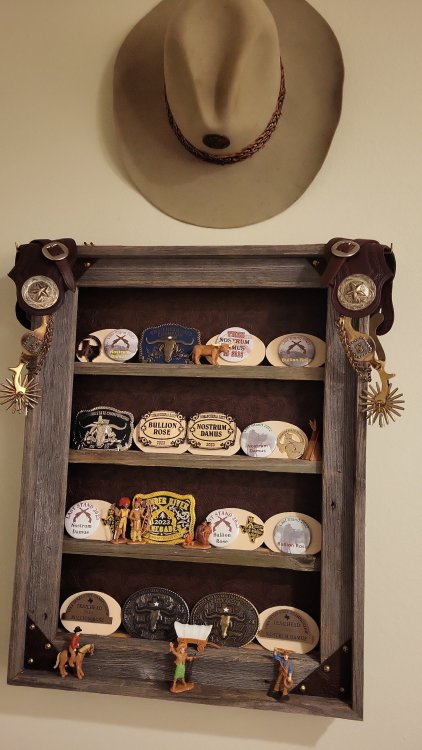
They don't mean much but it is a fun conversation piece on the wall -- especially for our non-shooting friends -- complete with Old West Action Figurines!!
-
Titewad for cowboy 12 ga.?
Nostrum Damus SASS #110702 replied to Reverend P. Babcock Chase's topic in SASS Wire
OK, for my light cowboy action loads, I am using charge bar 502-34 in my 9000GN press to drop 3/4 oz of #8 lead shot, with powder bushing #20 which drops about 14.4 gr of Titewad under Claybuster CB0175-12 pink wads. I use Federal 209A primers, not 209 as previously mentioned, though I doubt that matters at all. Great cowboy action shell. -
Titewad for cowboy 12 ga.?
Nostrum Damus SASS #110702 replied to Reverend P. Babcock Chase's topic in SASS Wire
I've used Titewad for years as well and it works great. I load light recoiling 3/4 oz loads in Win AA hulls with 209 primers and Claybuster CB0175-12 pink wads. I love shooting the shells and so does 110-lb Bullion Rose and they are more than adequate for every KD we've shot at. I'll check the MEC bushing in my 9000GN tomorrow for you. -
Also on Richmond in Houston and I've gotten some great bargains there: https://www.houstoncameraexchange.com/
-
We don't go down range without calling a cease fire across all stages, so it is not practical to go reset the KDs and plate racks by hand because at least one and usually two other posses would have to stop whatever they are doing.
-
FD -- Are you sure the yellow stuff is nylon? That is a very unusual color for nylon rope. The most common yellow stuff is polypropylene and it indeed weathers, while good quality nylon lasts a very long time without significant weathering damage. I tip my hat to all the pards who really like having to bring in ropes after every match, and then having to set them out again before every next match! Me, personally -- I'd rather use some ropes that are designed to live for years outside in full hot sun and all other conditions Mother Nature has to offer. Marine grade braided nylon rope works great but that "mule tape" stuff sounds great, too!
-
I'm currently in charge of maintaining our club's KD and plate rack reset ropes. My goal is to set things up so they last a very long time between required maintenance or replacement. Don't waste your time on cheap rope, the kind you can get at Home Depot in 100-foot rolls for $5 each -- it is false economy because the cheap stuff actually breaks down in UV (that is, sunlight). At least here in in the Texas sun and heat, that stuff lasts less then two months before it disintegrates. Get 3/8" or, better still, 1/2" solid braid marine grade rope that is designed to protect expensive floating toys for years under the worst outdoor conditions -- salt, sun, heat, wet. Multi-strand wire rope works at first but as soon as it kinks or twists or loops, or if any single one of the strands breaks, wire rope becomes a problem. Still, short lengths of wire rope are used at the targets because lead splatter will damage unprotected nylon rope. Make a loop at both mating ends of the wire rope and the nylon rope and connect the loops with carabiners. Also, there are some stages where using all nylon rope make more sense; wire rope simply won't smoothly ride the pulleys of our swinging target. On that stage, the several feet of nylon rope that is exposed to lead splatter is protected with rope chafe guards (Kevlar or Dyneema sleeves sold by the foot, secured on the rope with nylon zip-ties).
-
WTB lever wraps found some thanks
Nostrum Damus SASS #110702 replied to Happy Appy's topic in SASS Wire Classifieds
Happy Appy -- that's the Amazon link for YOU to buy them on Amazon. I bought what I need and you can too! They come in different colors, to boot! ND -
Bandelero for sale
Nostrum Damus SASS #110702 replied to Purly SASS # 57438's topic in SASS Wire Classifieds
Purly, delete the photo with your personal information showing. -
FS Win 97 Short Stock
Nostrum Damus SASS #110702 replied to Abilene Al, SASS #72248's topic in SASS Wire Classifieds
That's a good deal and your daughter, Ustas, will really like the shorter stock and it will totally change (for the better) how she handles the scattergun. All of us who have put short stocks on our petite ladies' 97s will vouch for that. -
WTB lever wraps found some thanks
Nostrum Damus SASS #110702 replied to Happy Appy's topic in SASS Wire Classifieds
https://www.amazon.com/gp/product/B07Y5PZ3R7/ref=ppx_yo_dt_b_search_asin_title?ie=UTF8&th=1 two wraps for $18. includes four lengths of synthetic sinew, two needles. I have put these on all my lever guns, they are fantastic. You watch the company's YouTube and do what the guy does along with him, and they turn out perfect every time. -
Non SASS bayonet forsaleOOPS correction
Nostrum Damus SASS #110702 replied to AlOvera's topic in SASS Wire Classifieds
Pardon me for asking: what is a P38 Enfield bayonet? I've never heard of it. -
Yellowed stainless NMVs
Nostrum Damus SASS #110702 replied to Nostrum Damus SASS #110702's topic in SASS Wire
Update. I removed the grips. Decided to start the experiment with new mineral spirits. Wiping did nothing. Rubbing hard with spirits-soaked clean shop rags did the trick though, albeit with substantial elbow grease added. I had to disassemble the ejector as well to get at all the nooks and crannies. The entire outer metal surfaces of all parts of both guns had the microscopically thin yet amazingly stubborn yellowed whatever-it-was on it. I then LIGHTLY oiled a silicone rag and wiped all surfaces again before reassembling both guns. They are both bright shiny white high polish stainless again. OLG, I'll never know if acetone would have worked better or faster. I had the time and elbow grease to spare, so I spent it. -
Yellowed stainless NMVs
Nostrum Damus SASS #110702 replied to Nostrum Damus SASS #110702's topic in SASS Wire
Good idea. I haven't really thought about which solvents on my shop's chemicals shelf I might try. Paint thinner (mineral spirits), acetone, carburetor cleaner (primarily methyl chloride), brake cleaner (primarily tetrachloroethylene), or something else. -
MEC 9000gn 12 ga Ides of March SOLD
Nostrum Damus SASS #110702 replied to Jack Spade's topic in SASS Wire Classifieds
I have one exactly as shown -- awesome machine at a great price. Someone should snap it up. -
I recently picked up a boxed consecutive SASS-numbered set of extremely lightly used polished stainless steel .357 Mag NMVs made in 2014. There are areas of steel on both guns that have a slight yellow tint, while other areas are bright white stainless in appearance. To my eye, it looks like yellowed lacquer. Has anyone seen this on Ruger NMVs? My 2008 high polish stainless NMVs do not show anything similar. Is it in fact some yellowed varnish or coating? What is the best way to remove it without damaging the polished stainless finish? Thanks in advance. Nostrum Damus
-
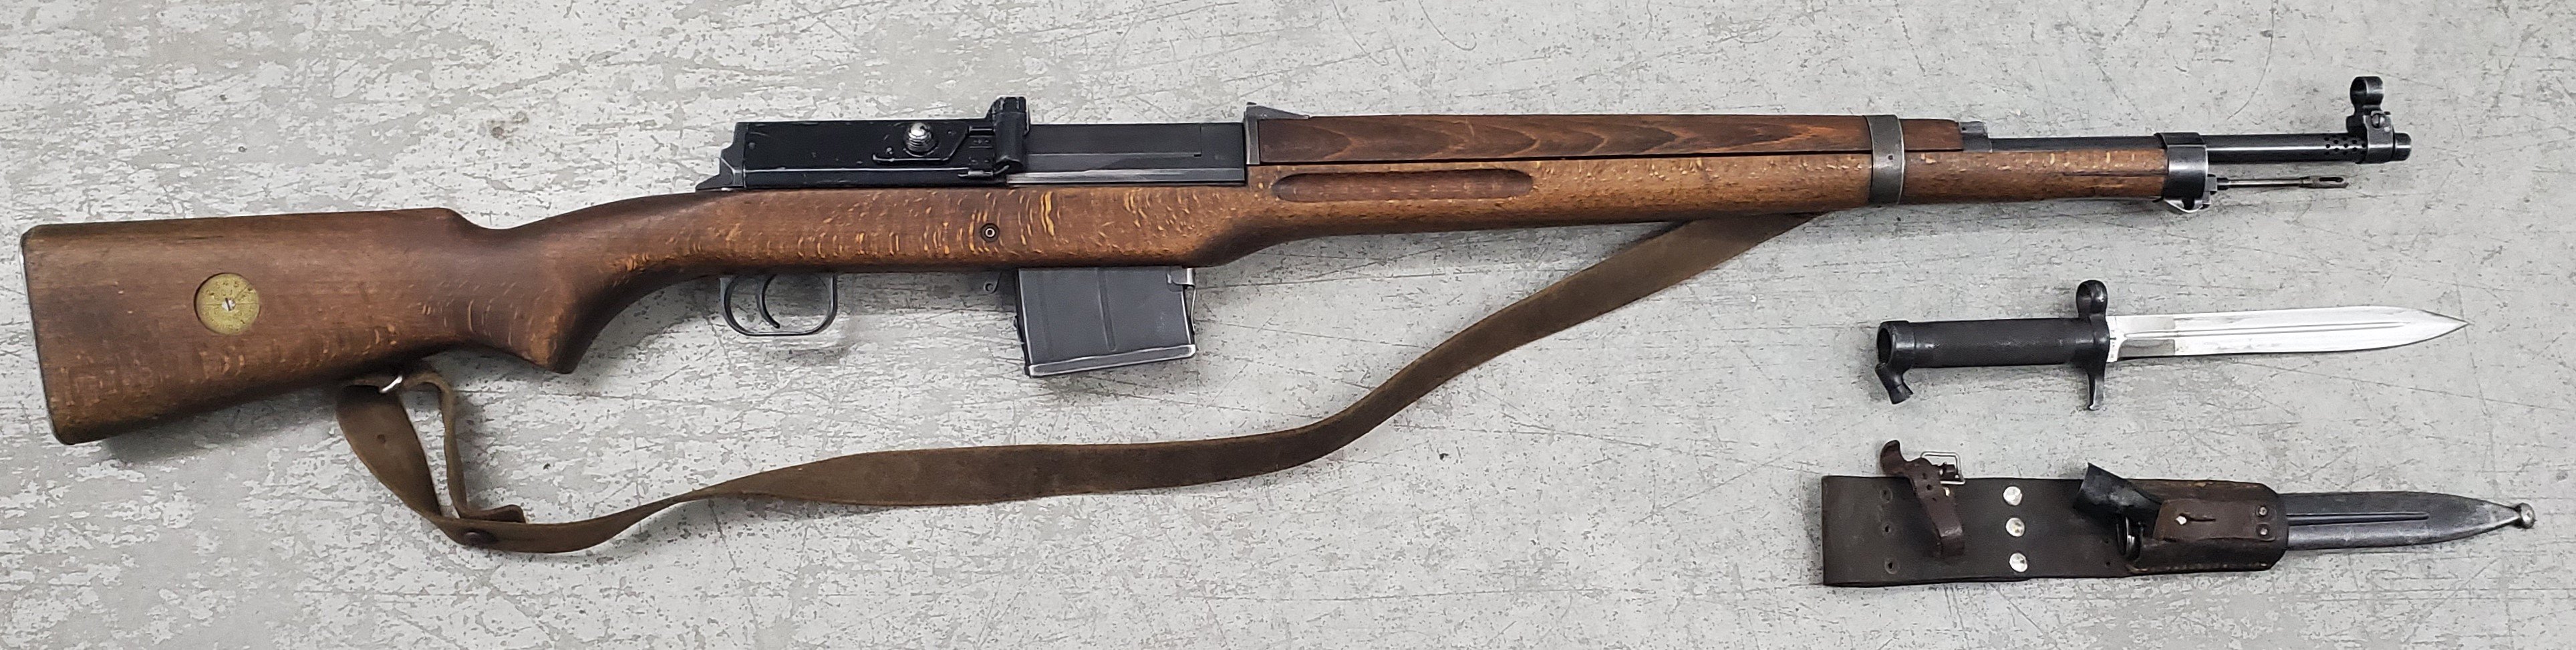
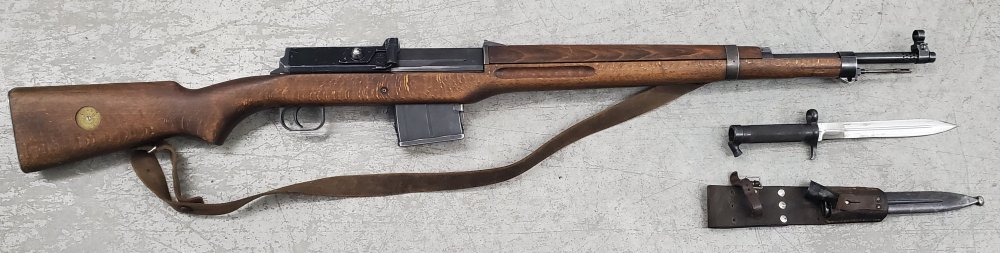
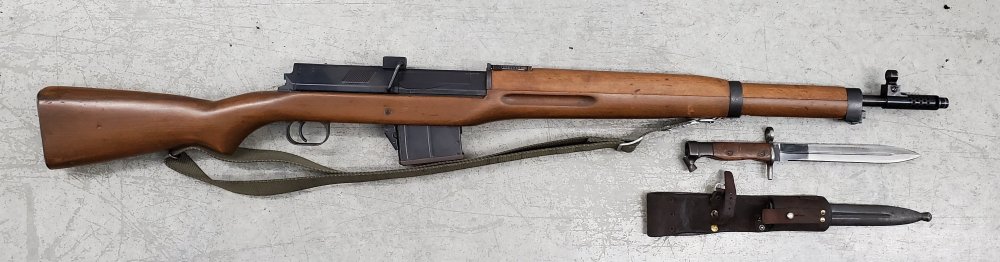
Oh, I almost forgot, I have an AG m/42b too. Brain is foggy today. The Swedish gun is much more pleasant to shoot.
-
I have its cousin, a Hakim, which was made by Egypt after it acquired the production line from Sweden after WWII. A few differences including the longer upper handguard, as well as chambering it for the millions of 7.92x57 cartridges left behind by the Germans. Really fun to shoot. If you're not careful when charging the magazine from a stripper clip, the bite of the bolt makes Garand Thumb look like a tiny nibble! And that's a good price!
-
CZ Hammerless Sharp-tail Coach? - Part 1
Nostrum Damus SASS #110702 replied to Matthew Duncan's topic in SASS Wire
The Stoeger doesn't have the same reputation for "stiff" that a new CZ Sharp Tail does. The CZ is built like a tank and once you do what you need to do to make it a useful SASS SxS, it is a joy to shoot and durable -- at least I've not heard of anyone breaking one in use. -
1st attempt at wet tumbling
Nostrum Damus SASS #110702 replied to Randy Saint Eagle, SASS # 64903's topic in SASS Wire
I STOLE one of the Boss's lingerie washing/drying fine mesh bags and I hang the knotted bag inside the door of the clothes dryer set to hot dry. I shake off the excess water in a towel before putting it into her delicates bag, give the bag a shake once or twice while drying and it is bone dry in a half hour to 45 minutes. -
1st attempt at wet tumbling
Nostrum Damus SASS #110702 replied to Randy Saint Eagle, SASS # 64903's topic in SASS Wire
You ... told her? What is wrong with you, man?? She may be the Boss but there are some things a man needs to keep to himself. -
CZ Hammerless Sharp-tail Coach? - Part 1
Nostrum Damus SASS #110702 replied to Matthew Duncan's topic in SASS Wire
Just to be clearer, you first use the abrasive pad I showed a picture of, like you would any sand paper. Start with 240 or 320 grit, go carefully, and work your way up to 800 or 1200 grit. Then, use a soft cotton polishing tip with jeweler's polish for the finishing touch. You will be amazed at how much you've reduced the friction of the gun hinge breaking open and closing. Best part, this takes only a few minutes to do. -
CZ Hammerless Sharp-tail Coach? - Part 1
Nostrum Damus SASS #110702 replied to Matthew Duncan's topic in SASS Wire
Take a look at the mating surfaces of the barrel hinge mechanism -- there will already be lots of wear marks if your gun is like mine was when new. It is a very tight fit and absolutely needs to be polished. Use a buffing tip on your Dremel and go slow, and start with very fine grit if you are afraid of taking off too much metal.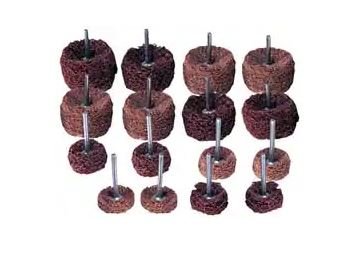
-
CZ Hammerless Sharp-tail Coach? - Part 1
Nostrum Damus SASS #110702 replied to Matthew Duncan's topic in SASS Wire
Have you polished all of the mating metal surfaces? Particularly nasty and in need of polishing are the two shafts of the extractor and their channels, and the cocking rods and their channels. AND all mating surfaces of the barrel hinge mechanism. -
CZ Hammerless Sharp-tail Coach? - Part 1
Nostrum Damus SASS #110702 replied to Matthew Duncan's topic in SASS Wire
yes, that's the one